1. 什么是sse
SSE(Server-Sent Events)是一种允许服务器向客户端推送实时数据的技术,它建立在HTTP和简单文本格式之上,提供了一种轻量级的服务器推送方式,通常也被称为”事件流Event Stream” 。
它通过在客户端和服务端之间建立一个长链接,并通过这条连接实现服务端和客户端的消息实时推送。
1.1 SSE的基本特性
HTML5中的协议是基于纯文本的简单协议
在浏览器段可供javascript使用的EventSource对象
EventSource提供了三个标准事件,同时默认支持短线重连
| 事件 | 描述 |
|---|---|
| onopen | 当成功与服务器建立连接是发生 |
| onmessage | 当收到服务器发来的消息时发生 |
| onerror | 当出现错误时发生 |
传输的数据有格式上的要求,必须为[data: …\n…\n] 或者是[retry: 10\n]
1.2 SSE 和 WebSocket
提到SSE,那自然要提一下WebSocket了,WebSocket是一种HTML5提供的全双工通信协议(指在可以同一时间允许两个设备之间进行双向发送和接收数据的通信协议),基于TCP协议,并复用HTTP的握手通道(允许一次TCP连接中传输多个HTTP请求和响应),常用语浏览器和服务器之间的实时通信。
SSE和WebSocket尽管功能类似,都是用来实现服务器向客户端实时推送数据的技术,但还是有一定的区别:
SSE(Server-Sent Events)
- 简单性:SSE使用简单的HTTP协议,通常建立在标准的HTTP或HTTPS连接之上。使得它对于一些简单的实时通知场景非常适用,特别是对于服务器向客户端单向推送数据。
- 兼容性:SSE在浏览器端具有较好的兼容性,因为它是基于标准的HTTP协议,即使在一些不支持WebSocket的环境中,SSE仍然可以被支持
- 适用范围:SSE适用于服务器向客户端单向推送通知,例如实时更新、事件通知等。但它仅支持从服务器到客户端的单向通信,客户端无法直接向服务器发送消息。
WebSocket
- 全双工通信:WebSocket提供了全双工通信,允许客户端和服务器之间进行双向实时通信。使得它适用于一些需要双向数据交换的应用,比如在线聊天、实时协作等。
- 低延迟:WebSocket的通常开销相对较小,因为它使用单一的持久连接,而不像SSE需要不断地创建新的连接。这可以降低通信的延迟。
- 适用范围:WebSocket适用于需要实时双向通信的应用,特别是对于那些需要低延迟、高频率的消息交换场景
选择SSE还是WebSocket?
- 简单通知场景:如果只需要服务器向客户端推送简单的通知、事件更新等,而不需要客户端与服务器进行双向通信,那么SSE是一个简单有效的选择
- 双向通信场景:如果需要实现实时通信,例如在线聊天、协作编辑等,那么WebSocket更合适
- 兼容性考虑:如果应用可能在一些不支持WebSocket的环境中运行,或者需要考虑到更广泛的浏览器兼容性,那么SSE可能是一个更可行的方案
1.3 SSE的本质
严格地说,HTTP协议无法做到服务器主动推送消息,但是有一种变通方法,就是服务器向客户端声明,接下来发送的是流信息streaming。
也就是说,发送的不是一次性的数据包,而是一个数据流,会连续不断地发送过来,这是,客户端不会关闭连接,会一直等待服务器发送过来的新的数据流。
SSE就是利用这种机制,使用流信息向浏览器推送信息。它基于HTTP协议,目前除了IE/Edge外,其他浏览器都支持。
1.4 SSE的优点
SSE使用HTTP协议,现有的服务器软件都支持,WebSocket是一个独立协议
SSE属于轻量级,使用简单;WebSocket协议相对复杂
SSE默认支持短线重连,WebSocket需要自己实现
SSE一般只用来传送文本,二进制数据需要编码后传送,WebSocket默认支持传送二进制数据
- SSE支持自定义发送的消息类型
2. 客户端API
2.1 EventSource对象
SSE的客户端API部署在EventSource对象上,下面的代码可以检测浏览器是否支持SSE。
1 | if('EventSource' in window){ |
使用SSE时,浏览器首先生成一个EventSource实例,向服务器发起连接
1 | var source = new EventSource(url); |
上面的url可以与当前网址同域,也可以跨域。跨域时,可以指定第二个参数,打开withCredentials属性,标识是否一起发送Cookie
1 | var source = new EventSource(url, {withCredentials: true}); |
EventSource实例的readyState属性,标识连接的当前状态。该属性只读,存在以下值:
0: 相当于常量EventSource.CONNECTING,表示连接还未建立,或者断线正在重连
1: 相当于常量EventSource.OPEN,表示连接已建立,可以接受数据
2: 相当于常量EventSource.CLOSED,表示连接已断开,且不会重连
2.2 基本用法
连接一旦建立,就会触发open事件,可以在onopen属性定义回调函数
1 | source.onopen = function(event){ |
客户端收到服务器发来的数据,就会触发message事件,可以在onmessage属性中定义回调函数
1 | source.onmessage = function(event){ |
上面代码中,事件对象的data属性就是服务器传回的数据(文本格式)。
如果发生通信错误(比如连接中断),就会触发error事件,可以在onerror属性中定义回调函数
1 | source.onerror = function(event){ |
close方法用于关闭SSE连接
1 | source.close(); |
2.3 自定义事件
默认情况下,服务器发来的数据,总是触发浏览器EventSource实例的message事件。我们可以自定义SSE事件,这种情况下,发送回来的额数据就不会触发message事件。
1 | //自定义连接关闭事件 |
那么服务端就需要发送stop事件:
1 |
|
3. 服务端实现
3.1 数据格式
服务器向浏览器发送的SSE数据,必须是UTF-8编码的文本,具有如下的HTTP头信息
1 | Content-Type: text/event-stream |
Content-Type必须执行MIME类型为event-stream。
每一次发送的信息,由若干个message组成,每个message之间用\n\n分割。每个message内部由若干行组成,每一行格式如下:
1 | [field]: value \n |
其中field可以由以下4个值:
dataeventidretry
此外,还可以有冒号开头的行,表示注释。通常,服务器每隔一段时间就会向浏览器发送一个注释,保持连接不中断。
1 | : This is a comment |
3.2 data字段
数据内容用data字段表示
1 | data: message\n\n |
如果数据很长,可以分成多行,最后一行用\n\n结尾,前面行用\n结尾
1 | data: begin message\n |
3.3 id字段
数据标识符用id字段表示,相当于每一条数据的编号
1 | id: mesg1\n |
浏览器用lastEventId属性读取这个值,一旦连接断线,浏览器会发送一个HTTP头,里面包含一个特殊的Last-Event-ID头信息,将这个值发送回来,用来帮助服务器端重新接连。因此可以被视为一种同步机制。
3.4 event字段
event字段表示自定义的事件类型,默认是message,浏览器可用addEventListener()监听该事件
1 | event: foo\n |
3.5 retry字段
服务器可用retry字段指定浏览器重新发起连接的事件间隔
1 | retry: 1000\n |
两种情况会导致浏览器重新发起连接:一种是时间间隔到期,二是由于网络错误等原因导致连接出错。
4. 代码工程
使用Springboot集成sse实现chatgpt流式交互
引入依赖
1
2
3
4
5
6
7
8
9
10
11
12
13
14
15
16
17
18
19
20
21
22
23
24
25
26
27
28
29
30
31
32
33
34
35
36
37
38
39
40
41
42
43
44
45
46
47
48
<project xmlns="http://maven.apache.org/POM/4.0.0" xmlns:xsi="http://www.w3.org/2001/XMLSchema-instance"
xsi:schemaLocation="http://maven.apache.org/POM/4.0.0 http://maven.apache.org/xsd/maven-4.0.0.xsd">
<modelVersion>4.0.0</modelVersion>
<groupId>org.example</groupId>
<artifactId>sse_demo</artifactId>
<version>1.0-SNAPSHOT</version>
<name>tika_demo</name>
<!-- FIXME change it to the project's website -->
<url>http://www.example.com</url>
<properties>
<project.build.sourceEncoding>UTF-8</project.build.sourceEncoding>
<maven.compiler.source>1.8</maven.compiler.source>
<maven.compiler.target>1.8</maven.compiler.target>
</properties>
<dependencies>
<dependency>
<groupId>org.springframework.boot</groupId>
<artifactId>spring-boot-starter-web</artifactId>
<version>2.5.1</version>
</dependency>
<dependency>
<groupId>org.springframework.boot</groupId>
<artifactId>spring-boot-autoconfigure</artifactId>
<version>2.5.1</version>
</dependency>
<dependency>
<groupId>org.springframework.boot</groupId>
<artifactId>spring-boot-starter-test</artifactId>
<version>2.5.1</version>
</dependency>
<dependency>
<groupId>org.projectlombok</groupId>
<artifactId>lombok</artifactId>
<version>1.18.24</version>
</dependency>
<dependency>
<groupId>cn.hutool</groupId>
<artifactId>hutool-all</artifactId>
<version>5.8.9</version>
</dependency>
</dependencies>
</project>编写controller
1
2
3
4
5
6
7
8
9
10
11
12
13
14
15
16
17
18
19
20
21
22
23
24
25
26
27
28
29
30
31
32
33
34
35
36
37
38
39
40
41
42
43
44
45
46
47
48
49
50
51
52
53
54
55
56
57package org.example;
import cn.hutool.core.util.IdUtil;
import lombok.AllArgsConstructor;
import lombok.Data;
import org.springframework.http.MediaType;
import org.springframework.stereotype.Controller;
import org.springframework.web.bind.annotation.*;
import org.springframework.web.servlet.mvc.method.annotation.SseEmitter;
import java.util.Map;
import java.util.concurrent.ConcurrentHashMap;
public class ChatController {
Map<String, String> msgMap = new ConcurrentHashMap<>();
public String send(String msg) {
String msgId = IdUtil.simpleUUID();
msgMap.put(msgId, msg);
return msgId;
}
public SseEmitter conversation( String msgId) {
SseEmitter emitter = new SseEmitter();
String msg = msgMap.remove(msgId);
//mock chatgpt response
new Thread(() -> {
try {
for (int i = 0; i < 10; i++) {
ChatMessage chatMessage = new ChatMessage("test", new String(i+""));
emitter.send(chatMessage);
Thread.sleep(1000);
}
emitter.send(SseEmitter.event().name("stop").data(""));
emitter.complete(); // close connetion
} catch (Exception exception) {
emitter.completeWithError(exception);
}
}).start();
return emitter;
}
}
class ChatMessage {
String role;
String content;
}Html页面
1
2
3
4
5
6
7
8
9
10
11
12
13
14
15
16
17
18
19
20
21
22
23
24
25
26
27
28
29
30
31
32
33
34
35
36
37
38
39
40
41
42
43
44
45
46
47
48
49
50
51
52
53
54
55
56
57
58
59
60
61
62
63
64
65
66
67
68
69
70
71
72
73
74
75
76
77
78
79
80
81
82
83
84
85
86
87
88
89
90
91
92
93
94
95
96
97
98
99
100
101
102
103
104
105
106
107
108
109
110
111
112
113
114
115
116
117
118
119
120
121
122
123
124
125
126
127
128
129
130
131
132
133
134
135
136
137
138
139
140
141
142
143
144
145
146
147
148
149
150
151
152
153
154
155
156
157
158
<html lang="en">
<head>
<meta charset="UTF-8">
<title>ChatGpt test</title>
<link rel="stylesheet" href="lib/element-ui/index.css">
<style type="text/css">
body{
background-color:white;
}
#outputCard{
height: 200px;
margin-bottom: 6px;
overflow:auto;
}
#inputCard{
height: 80px;
margin-bottom: 6px;
overflow:auto;
}
#outputBody{
line-height:30px;
}
.cursor-img{
height:24px;
vertical-align: text-bottom;
}
</style>
<script src="lib/jquery/jquery-3.6.0.min.js"></script>
<script src="https://cdn.jsdelivr.net/npm/vue@2.6.14/dist/vue.min.js"></script>
<script src="lib/element-ui/index.js"></script>
</head>
<body>
<h1 align="center">ChatGpt Test</h1>
<div id="chatWindow">
<el-row id="outputArea">
<el-card id="inputCard">
<div id="inputTxt">
</div>
</el-card>
<el-card id="outputCard">
<div id="outputBody">
<span id="outputTxt"></span>
<img v-if="blink" class="cursor-img" src="img/cursor-text-blink.gif" v-show="cursorImgVisible">
<img v-if="!blink" class="cursor-img" src="img/cursor-text-black.png" v-show="cursorImgVisible">
</div>
</el-card>
</el-row>
<el-row id="inputArea">
<el-col :span="21">
<el-input id="sendTxt" v-model="input" placeholder="input content" @keyup.native="keyUp"></el-input>
</el-col>
<el-col :span="3">
<el-button id="sendBtn" type="primary" :disabled="sendBtnDisabled" @click="sendMsg">send</el-button>
</el-col>
</el-row>
</div>
</body>
<script type="text/javascript">
var app = new Vue({
el: '#chatWindow',
data: {
input: '',
sendBtnDisabled: false,
cursorImgVisible: false,
blink: true
},
mounted: function(){
},
methods: {
keyUp: function(event){
if(event.keyCode==13){
this.sendMsg();
}
},
sendMsg: function(){
var that = this;
//init
$('#outputTxt').html('');
var sendTxt = $('#sendTxt').val();
$('#inputTxt').html(sendTxt);
$('#sendTxt').val('');
that.sendBtnDisabled = true;
that.cursorImgVisible = true;
//send request
$.ajax({
type: "post",
url:"/chat/send",
data:{
msg: sendTxt
},
contentType: 'application/x-www-form-urlencoded',
success:function(data){
var eventSource = new EventSource('/chat/conversation/'+data)
eventSource.addEventListener('open', function(e) {
console.log("EventSource连接成功");
});
var blinkTimeout = null;
eventSource.addEventListener("message", function(evt){
var data = evt.data;
var json = JSON.parse(data);
var content = json.content ? json.content : '';
content = content.replaceAll('\n','<br/>');
console.log(json)
var outputTxt = $('#outputTxt');
outputTxt.html(outputTxt.html()+content);
var outputCard = $('#outputCard');
var scrollHeight = outputCard[0].scrollHeight;
outputCard.scrollTop(scrollHeight);
//cusor blink
that.blink = false;
window.clearTimeout(blinkTimeout);
//200ms blink=true
blinkTimeout = window.setTimeout(function(){
that.blink = true;
}, 200)
});
eventSource.addEventListener('error', function (e) {
console.log("EventSource error");
if (e.target.readyState === EventSource.CLOSED) {
console.log('Disconnected');
} else if (e.target.readyState === EventSource.CONNECTING) {
console.log('Connecting...');
}
});
eventSource.addEventListener('stop', e => {
console.log('EventSource连接结束');
eventSource.close();
that.sendBtnDisabled = false;
that.cursorImgVisible = false;
}, false);
},
error: function(){
that.sendBtnDisabled = false;
that.cursorImgVisible = false;
}
});
}
}
})
</script>
</html>编写启动类
1
2
3
4
5
6
7
8
9
10
11
12
13
14
15
16
17
18
19
20package org.example;
import org.springframework.boot.SpringApplication;
import org.springframework.boot.autoconfigure.SpringBootApplication;
import org.springframework.boot.web.servlet.ServletComponentScan;
import org.springframework.scheduling.annotation.EnableScheduling;
import org.springframework.stereotype.Controller;
/**
* @author 小余哥
*/
public class ChatApplication {
public static void main(String[] args) {
SpringApplication.run(ChatApplication.class, args);
}
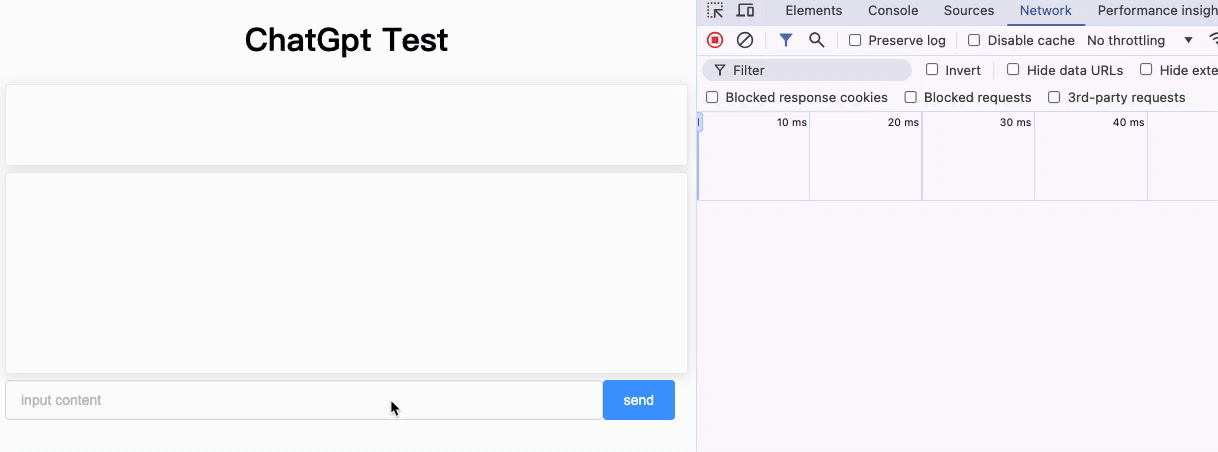
}启动程序访问HTML页面
request 1
http://localhost:8080/chat.html
测试